This post outlines the steps that you can follow to implement DevOps in Azure pipeline. The steps includes setting up an application, creating continuous integration, continuous delivery and release pipelines in Azure environment.
What is DevOps?
DevOps is the union of people, process, and tools to enable continuous delivery of value to our end users.
Most people feel that DevOps is just operations where developers push software into servers. It’s really more than development, its whole life-cycle of your application from back-log prioritization to development to delivery of the product to customers and monitoring in actionable feedback to enhance your product.
Step 1: Setting up an application in AZURE with version control
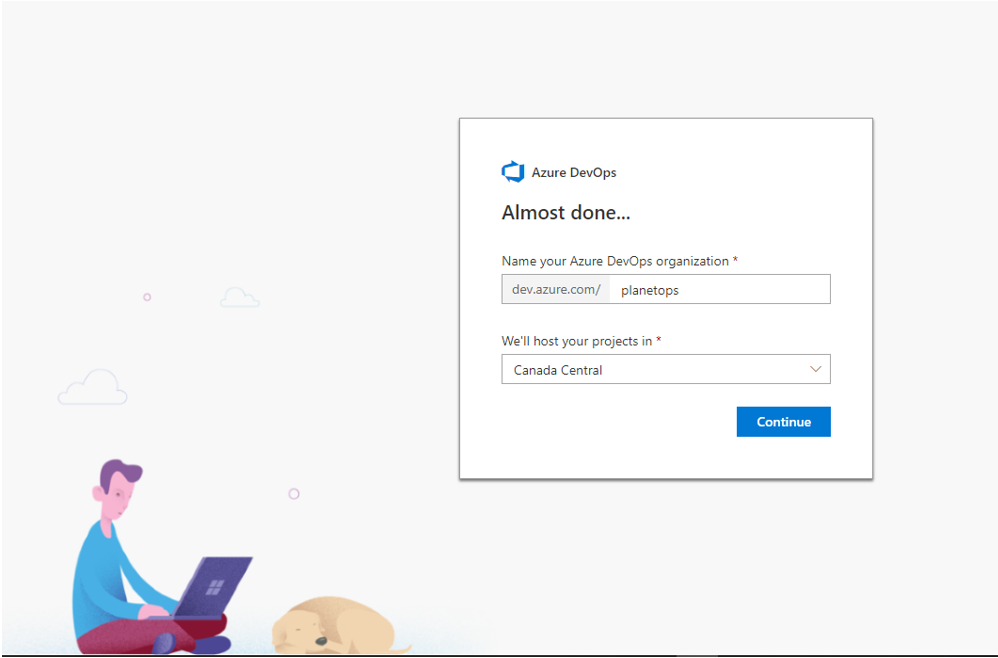
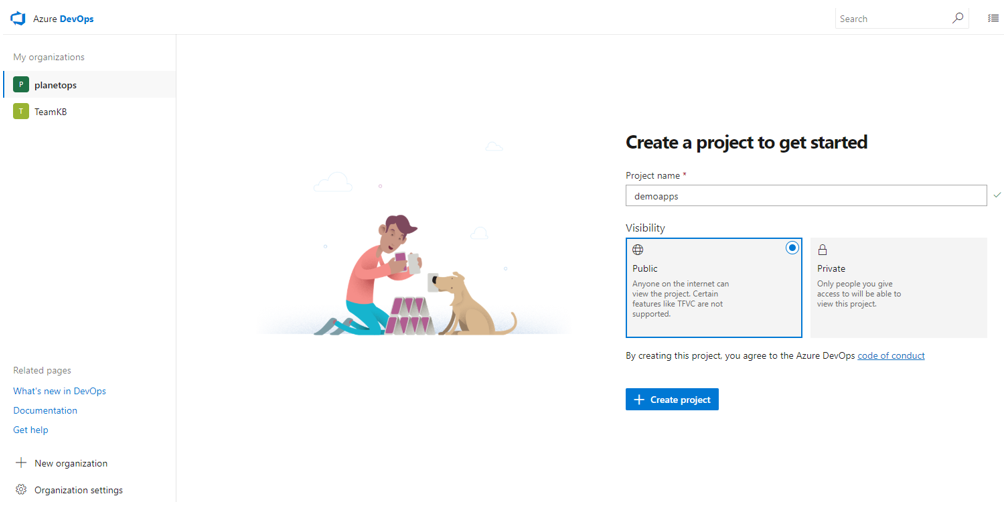
Visit https://dev.azure.com , sign in with Microsoft account. Create a project as follows
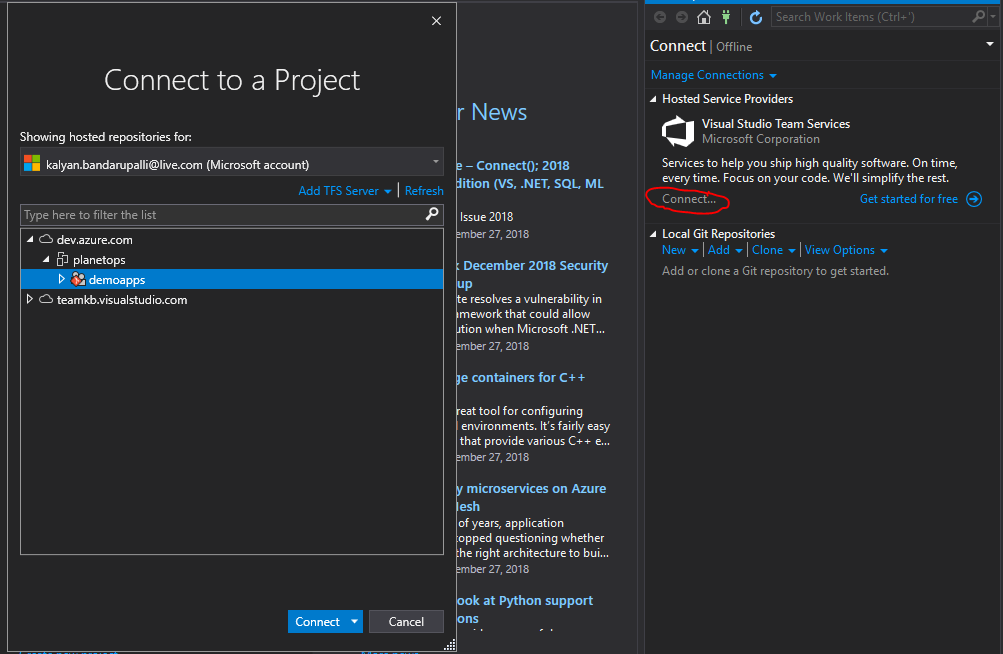
DevOps does not work very well without setting-up a version control. This can TFVC (team foundation version control) or GitHub integrated in TFS. Connect to the created project from visual studio as follows, version control in this case is GitHub.
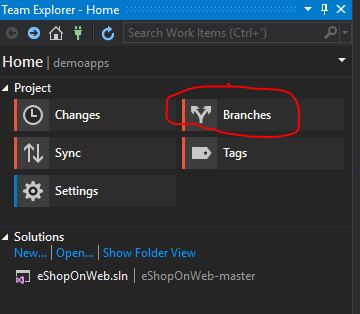
After cloning repository to local, add your source code to it Git. Let’s create two branches master and dev branches.
First commit your source code from your local repository to master and then create dev branch from master

Master branch is the one we take code from for release but developers wouldn’t work on this branch. If it’s single person working on project then choose Commit All and Push otherwise Choose Commit All and Sync.
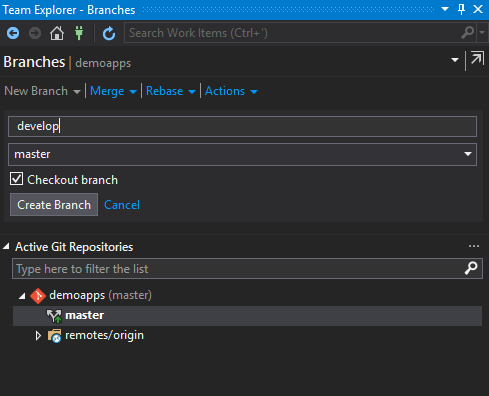
Now create a develop branch by clicking branches in team explorer, you notice the master branch there, right-click on master and say new local branch from and name develop as follows
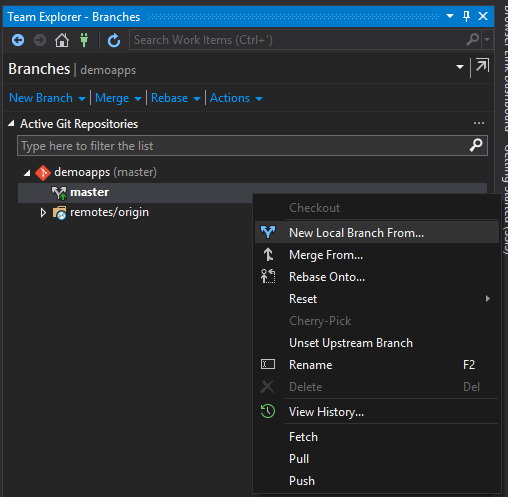
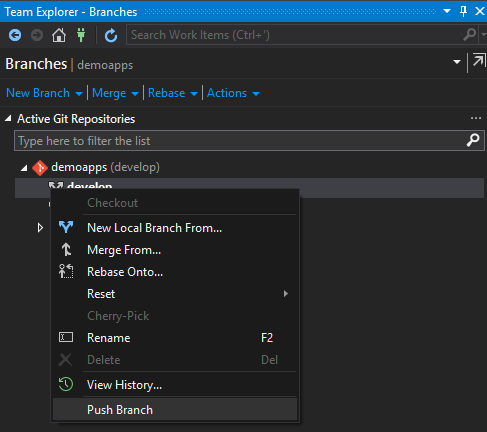
You have to publish the branch to make it available for use by right click on develop and say publish branch. Both master and develop branches are identical, you can start working on develop branch.
Step 2: Create a Continuous Integration (CI) build pipeline
Purpose of creating CI integration build is to run clean automated builds quickly especially when multiple developers integrating their code to shared repository. This also helps in finding the defects early.
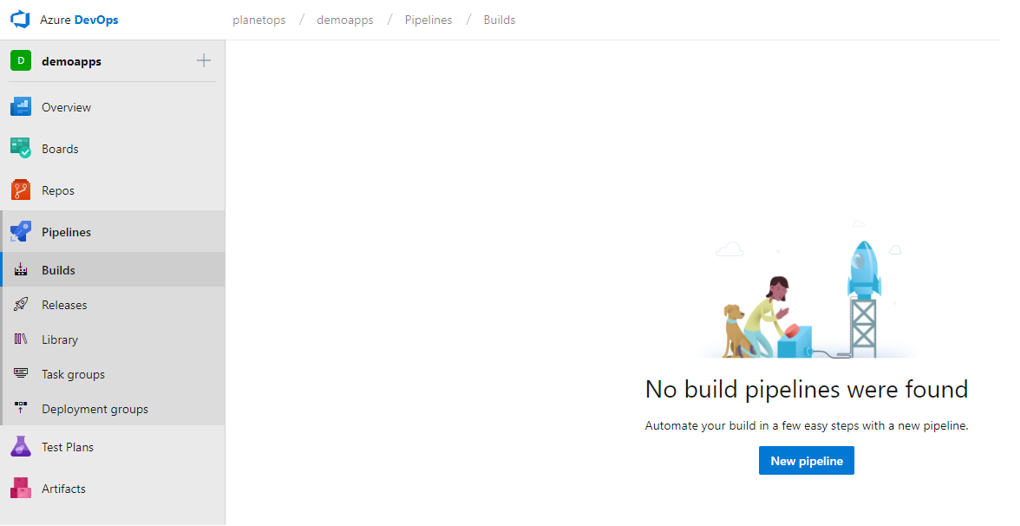
Login into VSTS (Visual Studio Team Services) https://dev.azure.com/planetops/demoapps use your respective project URL.
From VSTS home screen click pipelines and click Builds
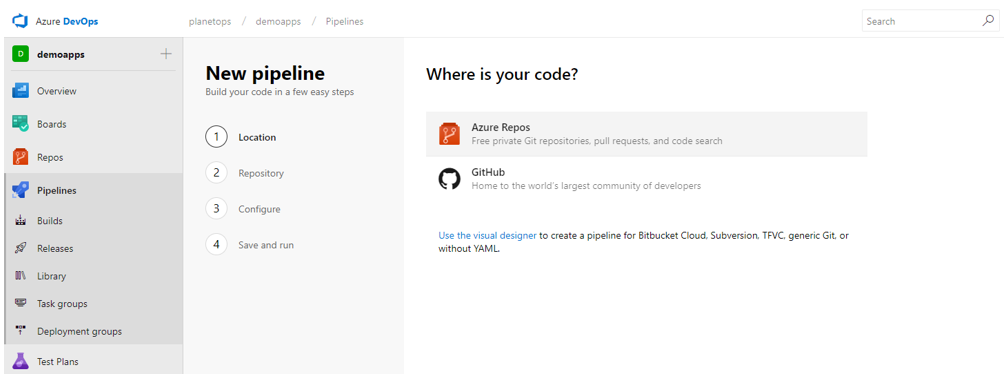
Create a new build pipe line by clicking new pipeline button, select the location of code in this case choose Azure Repos
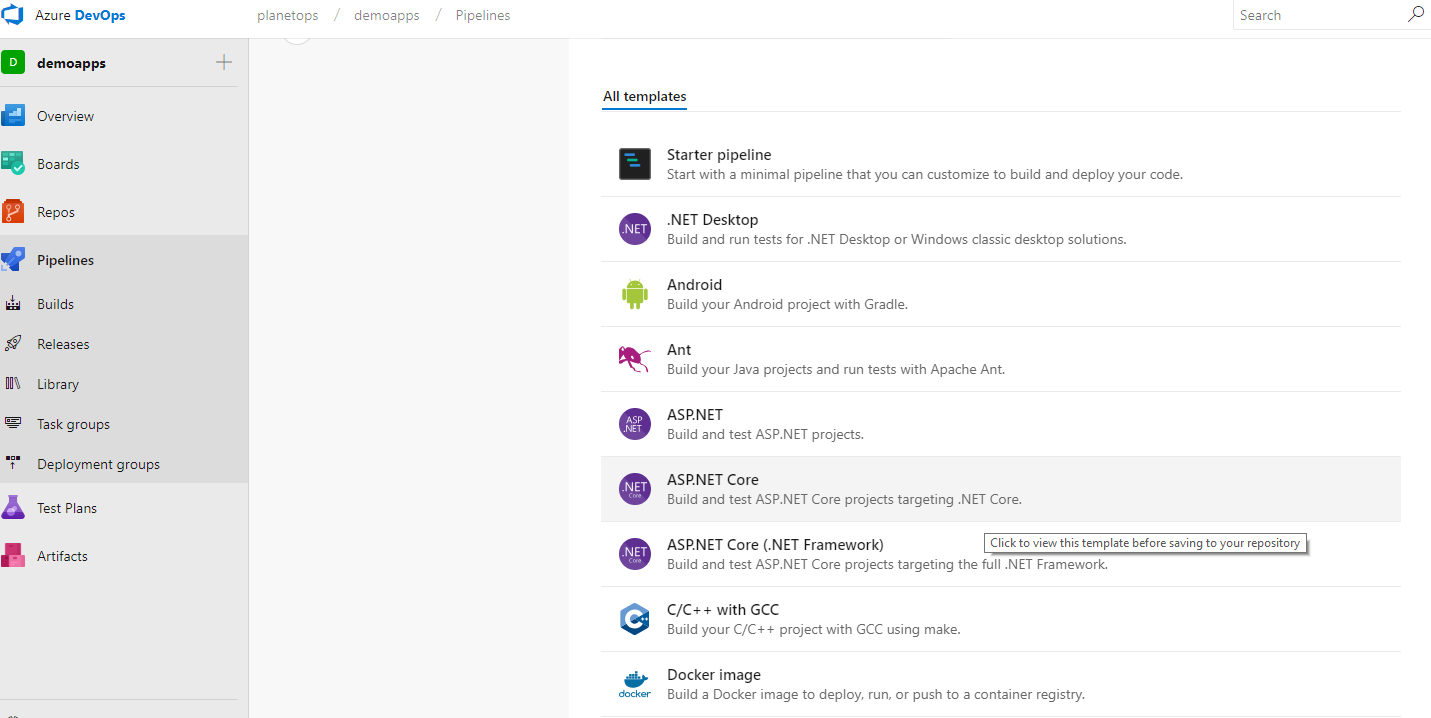
After selecting the repository path it will prompt you to select the template that suites your project. Notice it is not strictly Microsoft, you will find various templates like Maven for java, Android, Xcode etc. In this case we choose ASP.NET CORE template.
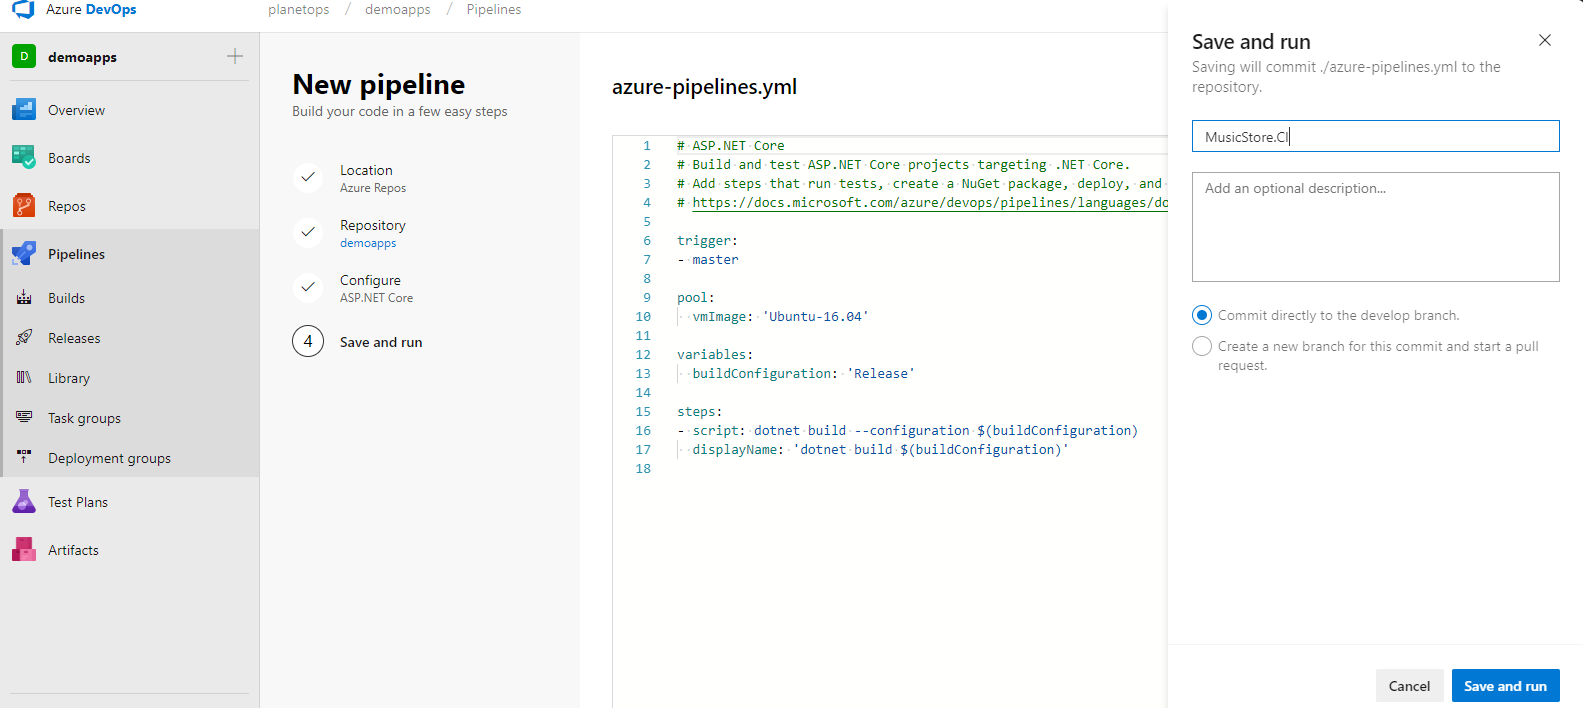
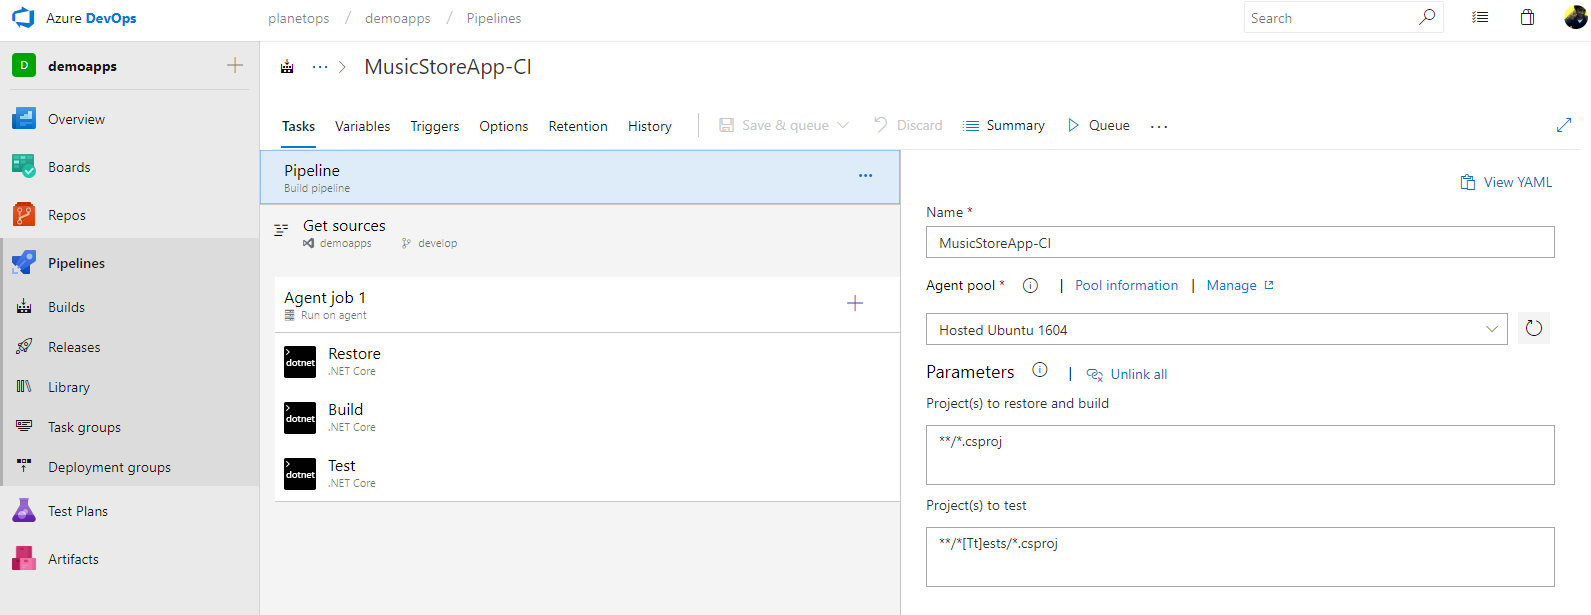
Give a name to build and say commit the build to development branch and run.
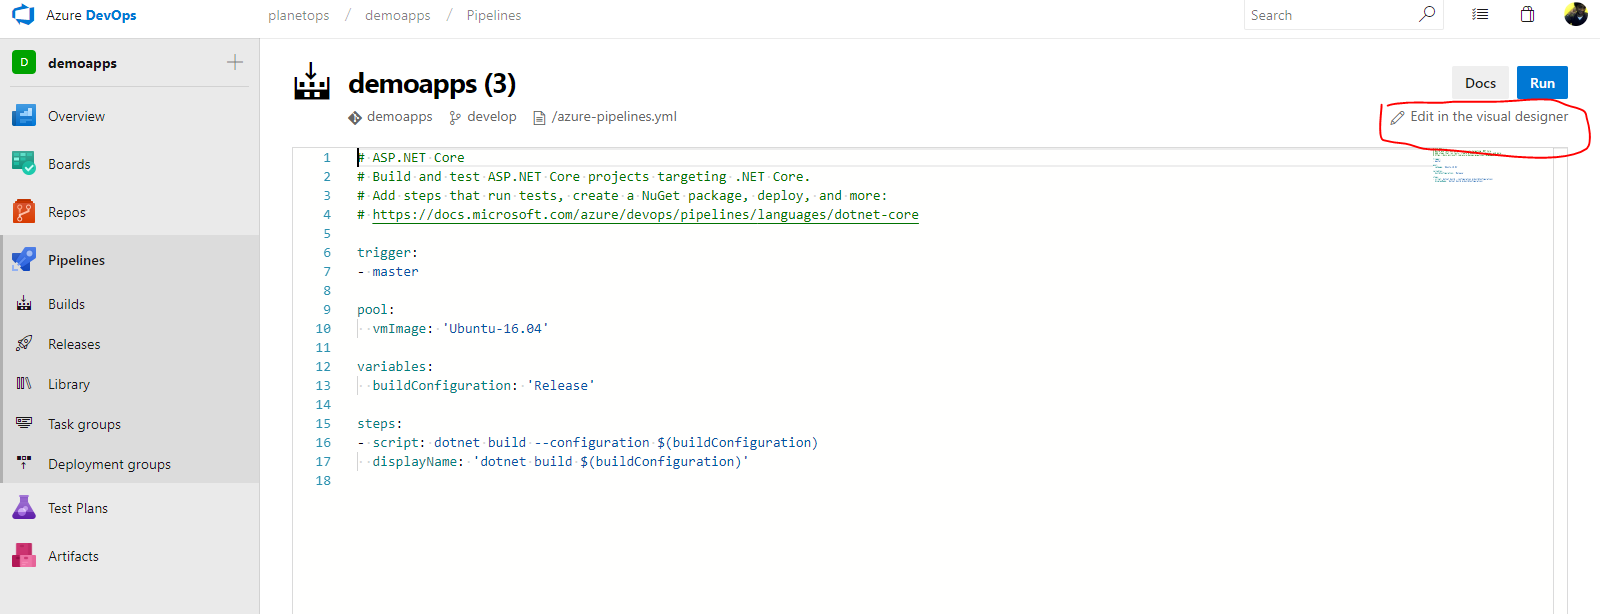
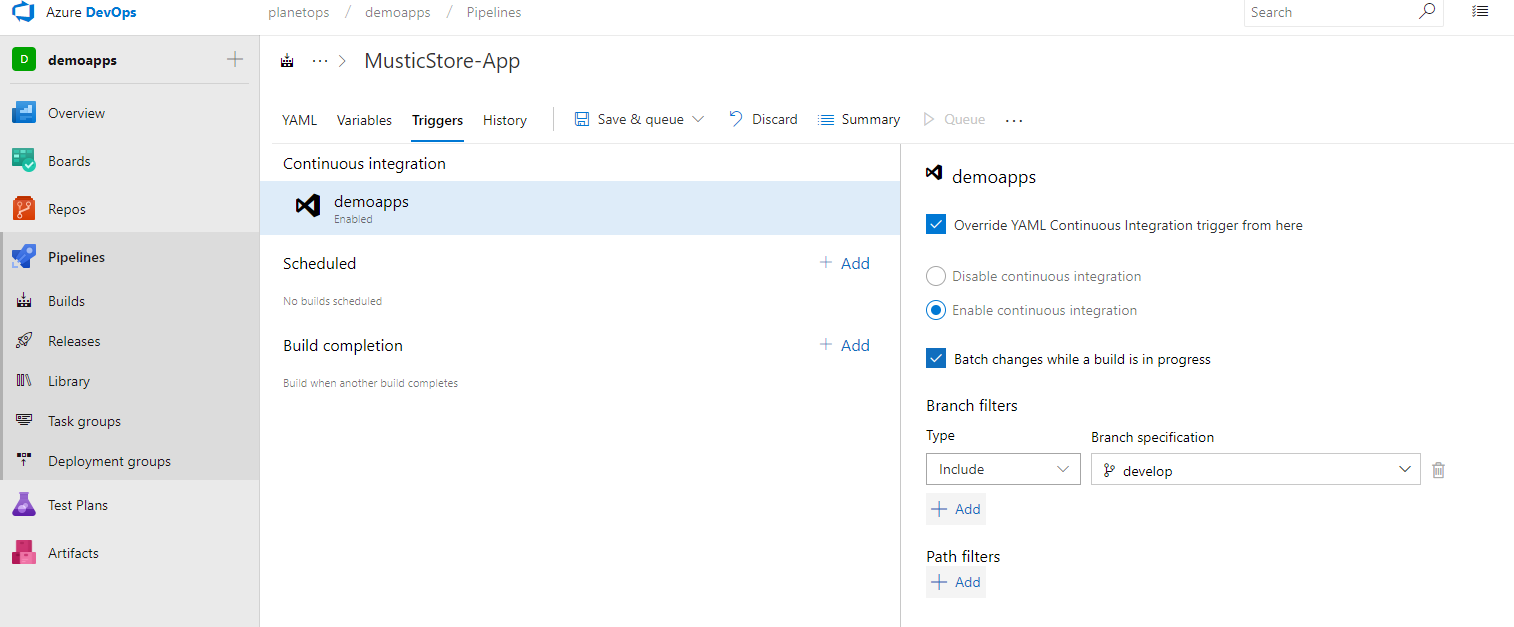
You can also edit the build definition in visual designer
You can override the default configuration in visual designer. Example: when lot of team members updating code often and you want to reduce the number of builds that are running then check batch changes check box. When you check this box system waits until the build is completed.
You can additional steps during the continuous integration build like restoring nugget packages, running batch scripts, copying files and running some unit test cases. You can do this by selecting ASP.NET core template.
Step 3: Create a Continuous Delivery (CD) build pipeline
Purpose of creating Continuous Delivery pipeline is to transfer all development changes to production ready build in a risk free and quick manner. The goal is ability to deliver the higher quality product to customers with automated builds.
Initially it may take some time to setup pipe-lines in your builds and get everything work correctly, you don’t have to spend this time and money every time you deploy your software manually to servers. Thanks to tolls that make your life easy!
Create a build definition like in step2 for master branch. Idea is to kick this build soon the code merged into master branch.
How the code get merged into master branch? Developers create pull requests for review which in turn get into master branch.
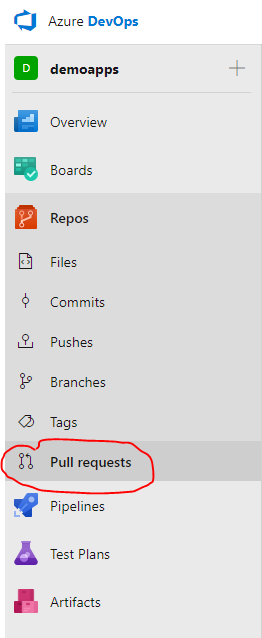
Create a new pull request by navigating to VSTS (VisualStudioTeamService) home screen and click pull requests under repos. You can do this from Visual Studio team explorer too
The idea of creating a new pull request is to transfer develop branch changes to master.
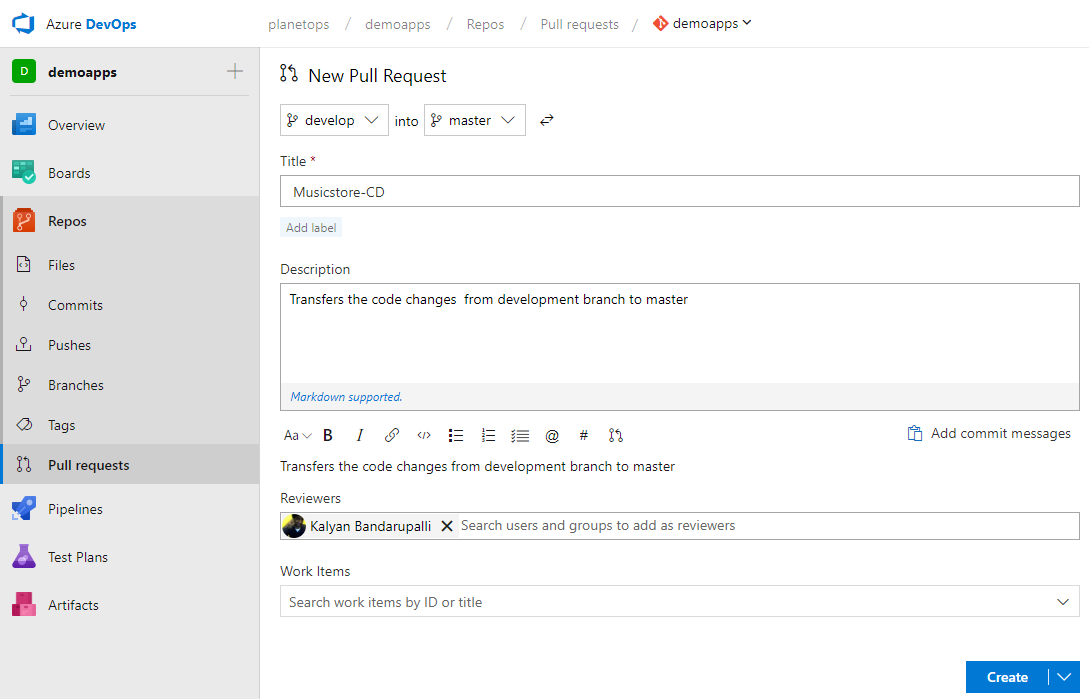
While creating new pull request, you can add all commit changes and add reviewer for the approval. Once pull request has been created, you can approve and complete.
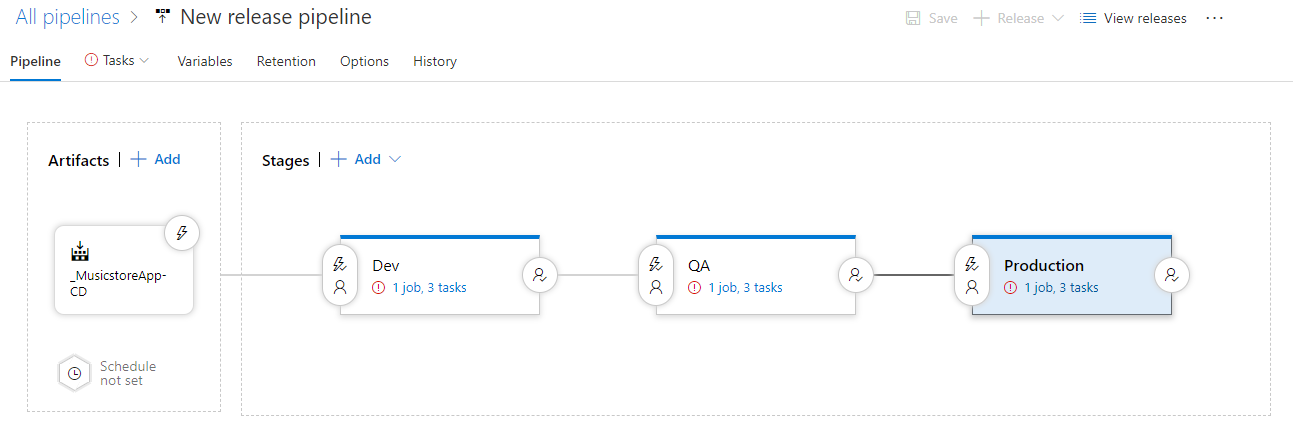
Step 4: Create a Release pipeline
Purpose of creating release pipeline is to deploy changes from master branch (CD build) to various environments (stages) like dev, QA and production
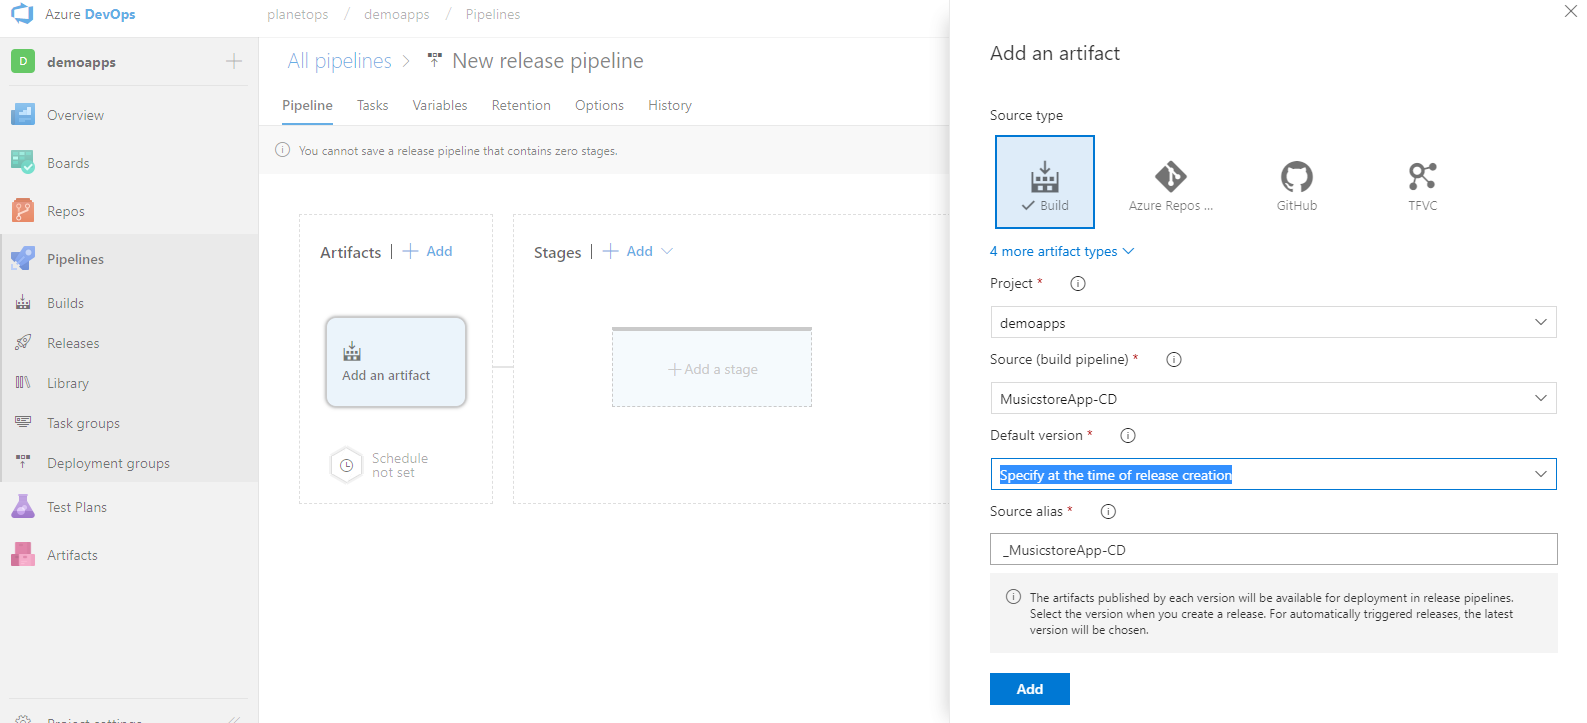
Create a new release pipeline from by clicking releases in VSTS home screen.

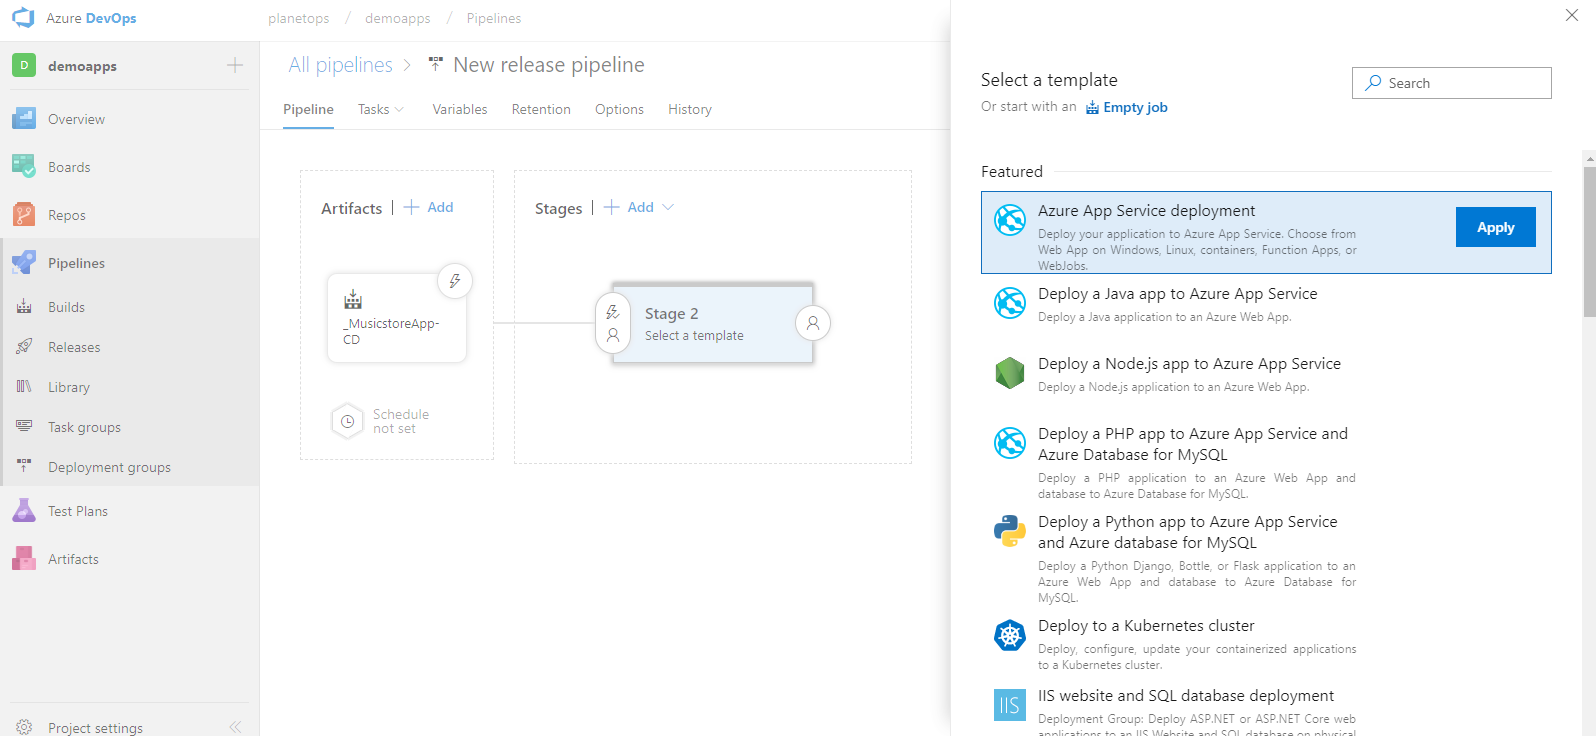
Click on build and select CD build that you created in Step 3. Next click on Add stage box name the stage Dev and add Azure App Service deployment tasks to it
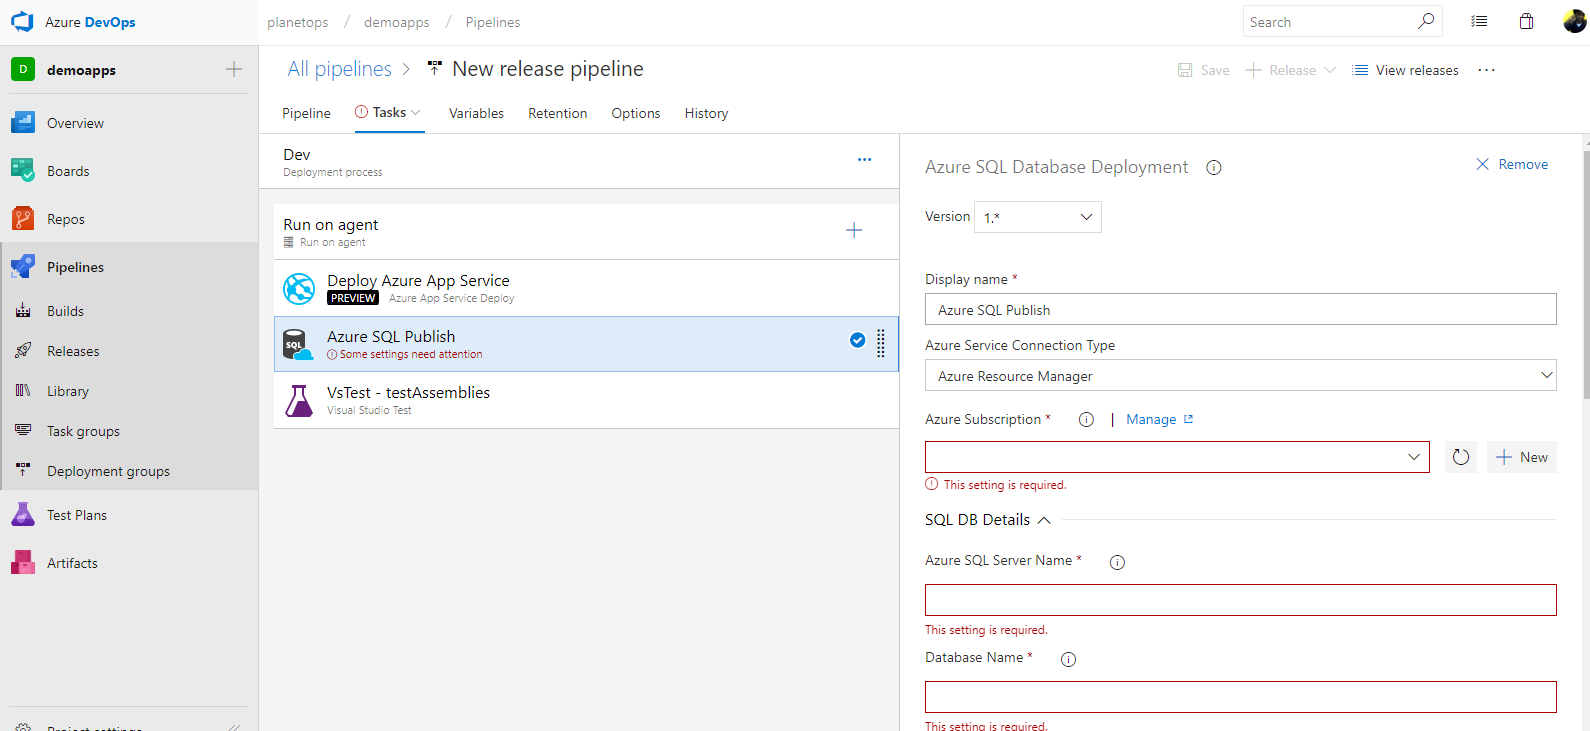
You need provide your subscription details to deploy it to AZURE. You can add other tasks like running some tests after deploying to azure. You can also include tasks like run some database restore in dev environment and run some cloud based load testing.
The tasks inside dev stage appear as follows
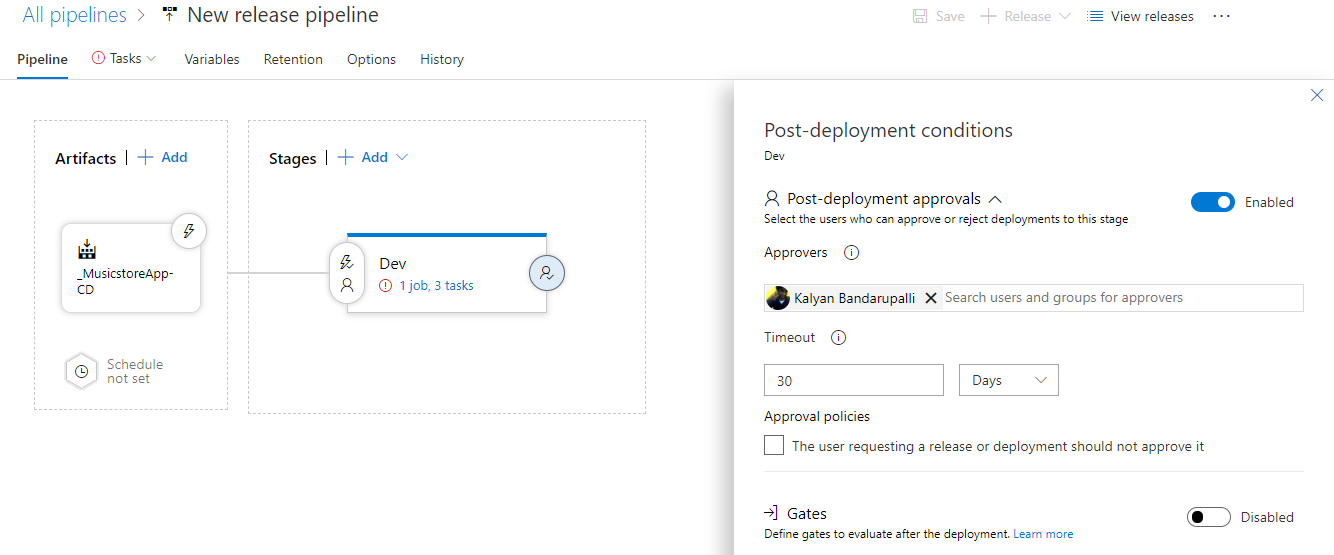
You can add post-deployment conditions to pipeline, example: adding approvers to authorize the deployment
Based on the dev stage environment, you can clone QA, Prod and update the configurations. The final release pipe-line looks as follows
You can also add more tasks like application insights to each stage to monitor your application.