This post outlines the steps that require to secure ASP.NET Core 3.0(preview) Web API using AZURE AD. Web API uses Azure AD as identity provider which implements the OAuth2 standards. In this case AZURE AD grants the tokens to applications. Don’t get confused with OpenIDConnect and OAuth2.
OpenIDConnect protocol implements OAuth2 standards. OpenID is not just for APIs, it can be used for web , mobile and desktop applications. Welcome to token-based security where client applications send tokens to Web API. Token is a client-consent granted by user to application to access api. Questions How do we create tokens? How do we safely deliver to the applications? How to consume token in client applications?
What is Oauth2?
Oauth2 is open protocol provides secure authorization to mobile, web and desktop applications. Client application sends a request for an access token to Oauth2 endpoint to gain access to API.
Application architecture and security for API
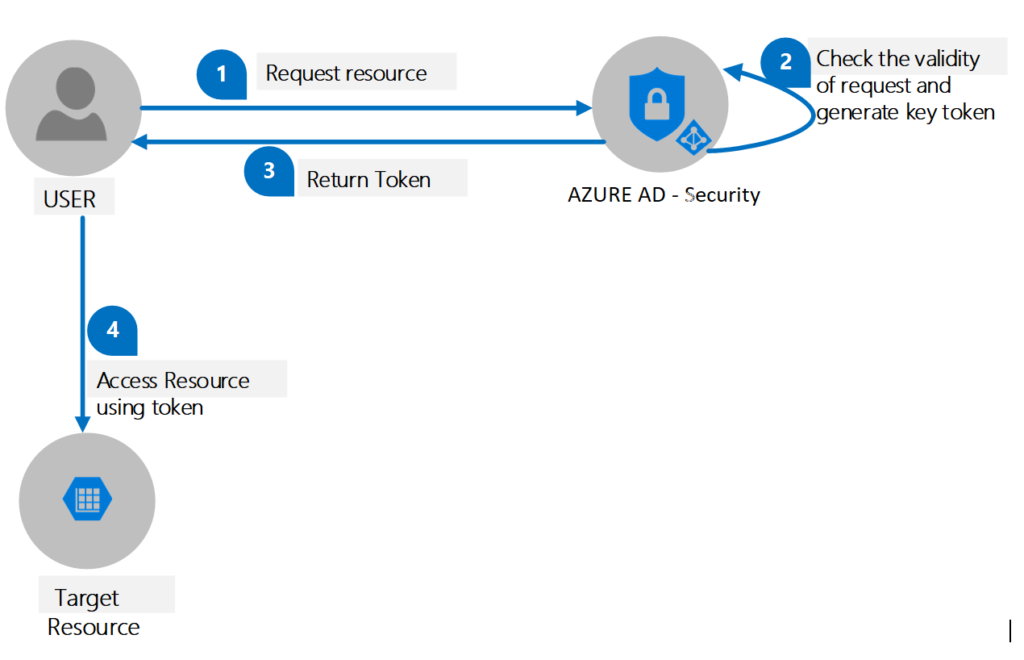
- User sends a request for resource to AZURE AD Security component. Request contains Client ID, authorization code and Redirect URI.
- Security component uses AZURE AD, OAuth and OWIN components to validate the user request.
- Security component generates an access token and sends it to the user.
- User access the resource using access token
To implement above architecture, Follow the steps
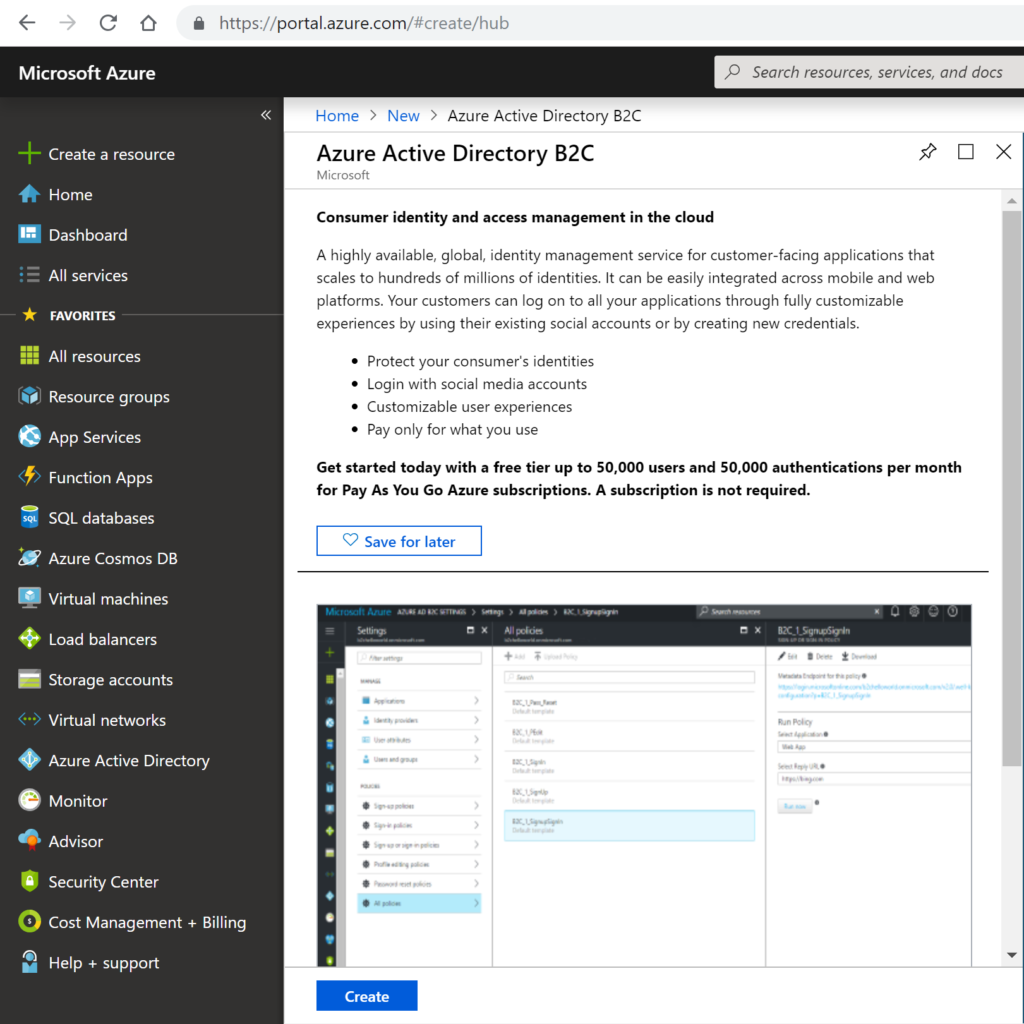
Step 1 – Create an AZURE AD B2C Tenant
- Login to AZURE portal, create a new resource by typing AZURE AD B2C in search box
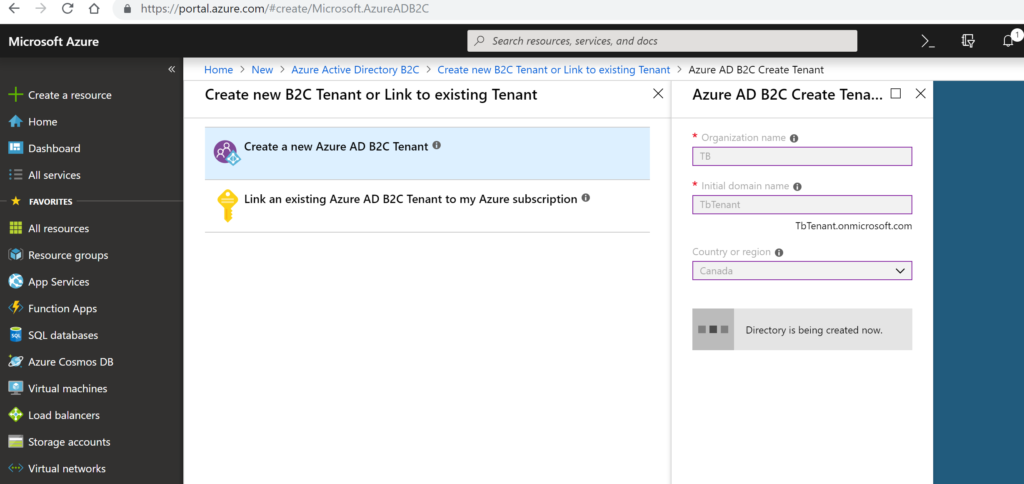
2. Select Create AZURE AD B2C tenant by giving organization name and domain
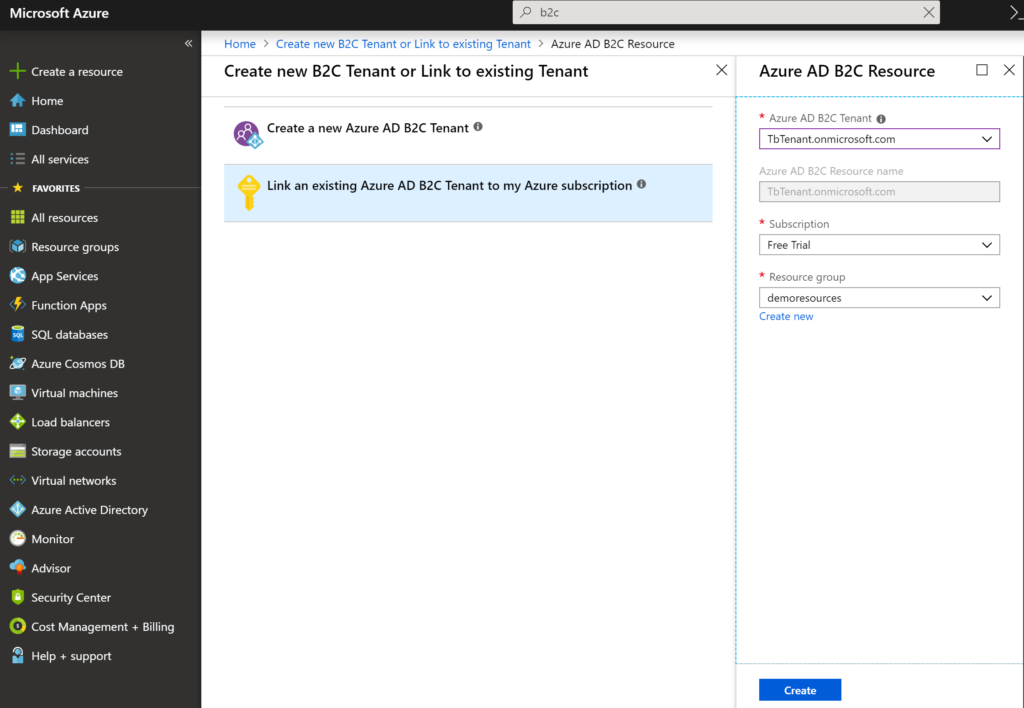
after creating it, link to AZURE Subscription as shown in following screen
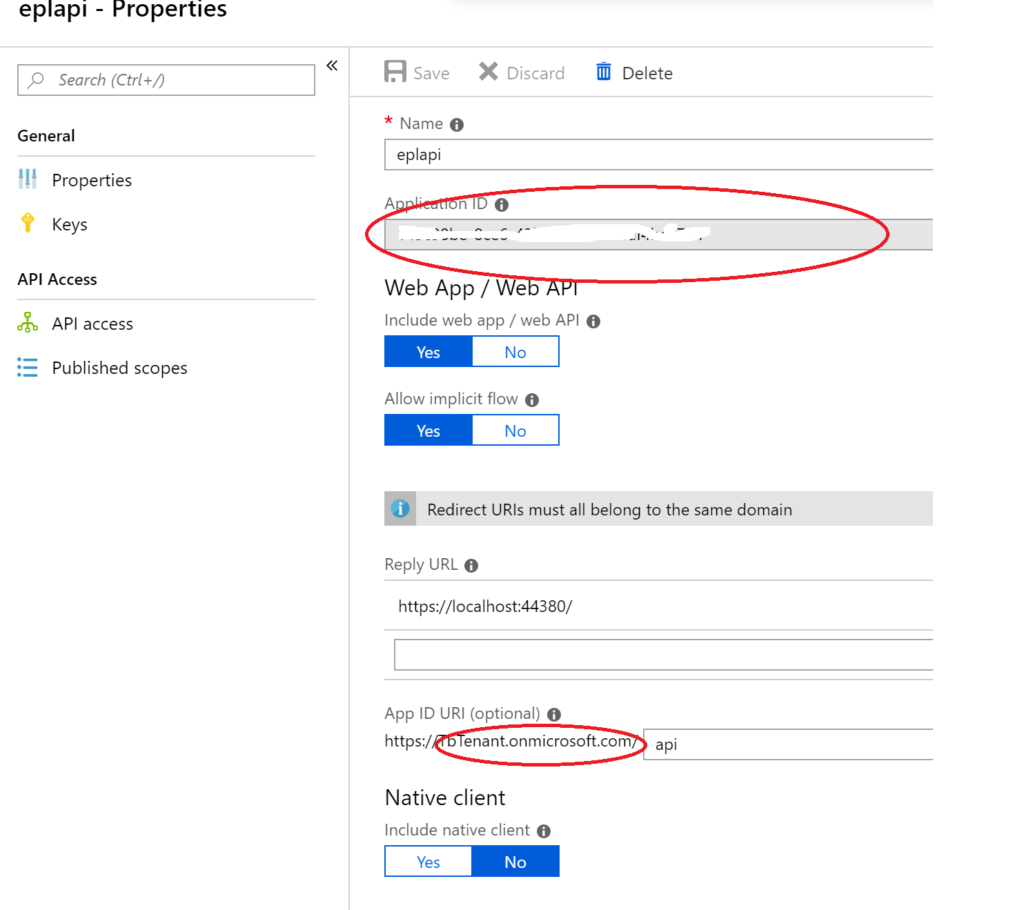
Step 2 – Register Web API application in AZURE AD B2C
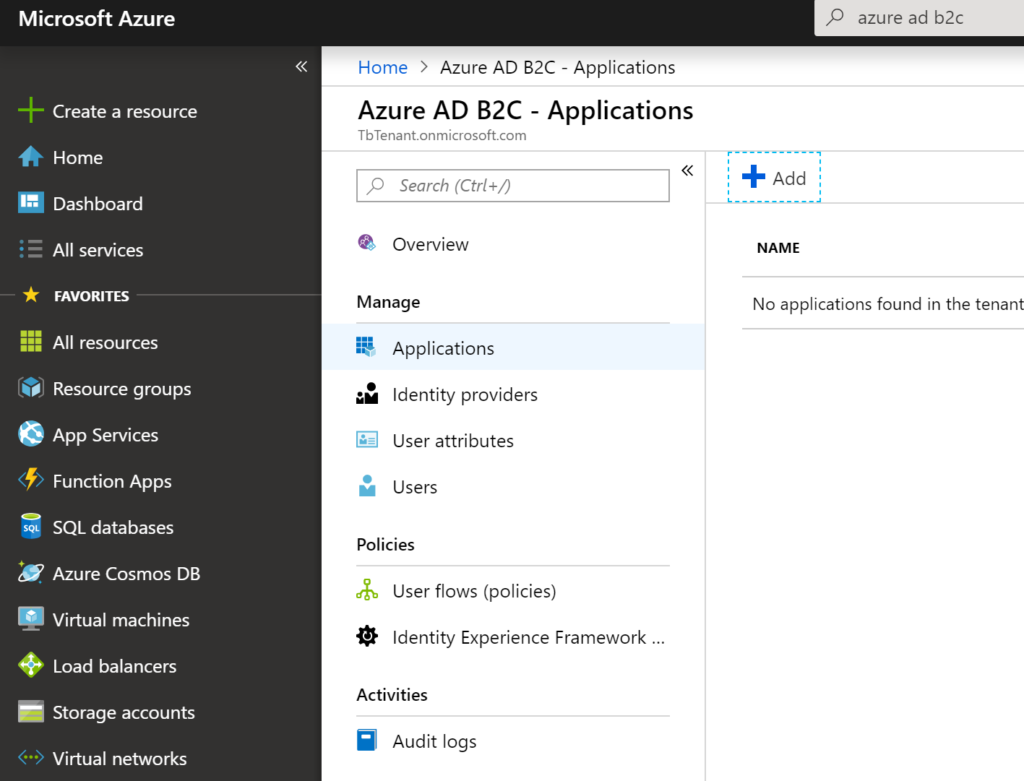
- Navigate to the tenant that you have created in above step, select applications and say Add
2. Enter name of the application example: eplapi, Select yes for Web API and Yes for Implicit flow.
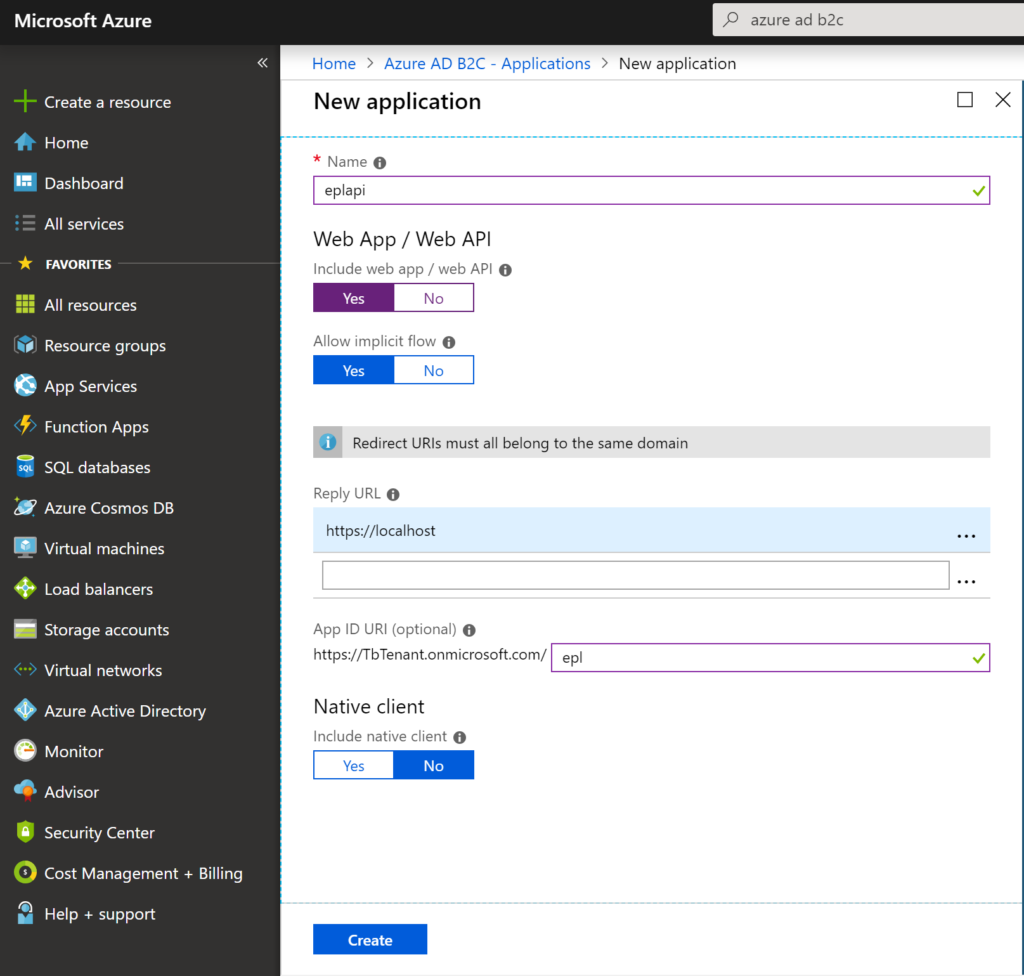
enter reply URL as your api end point. It must be on https. click create to add application to tenant.
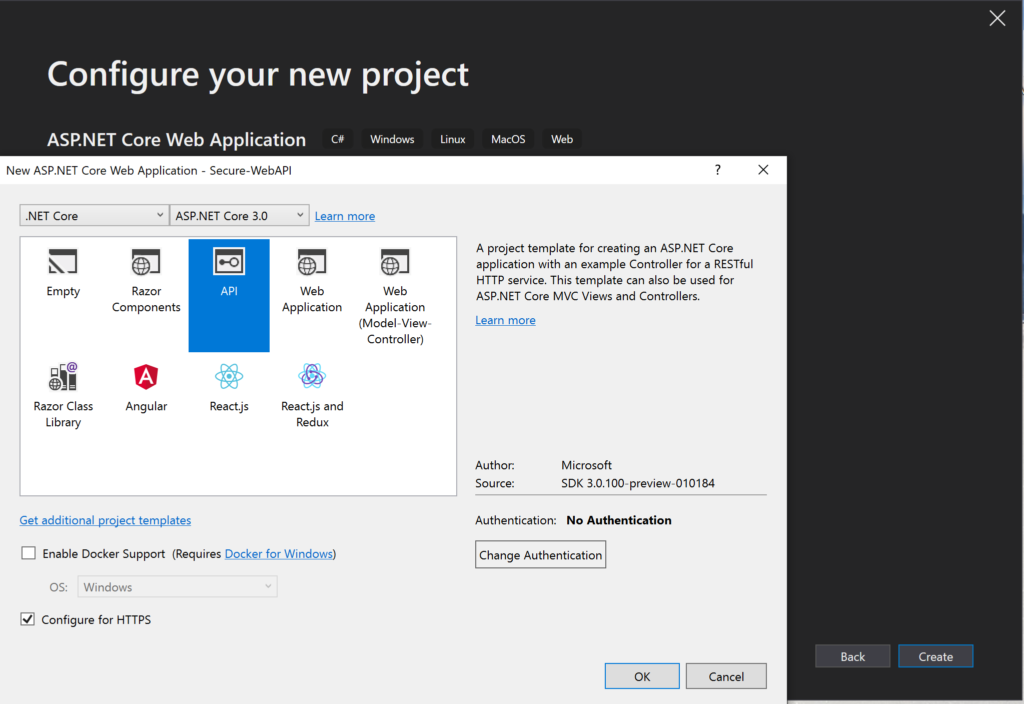
Step 3 – Create ASP.NET Core 3 Web API in VS 2019
click change authentication button. select connect to an existing user store in the cloud option from drop-down and enter the application id and domain values.
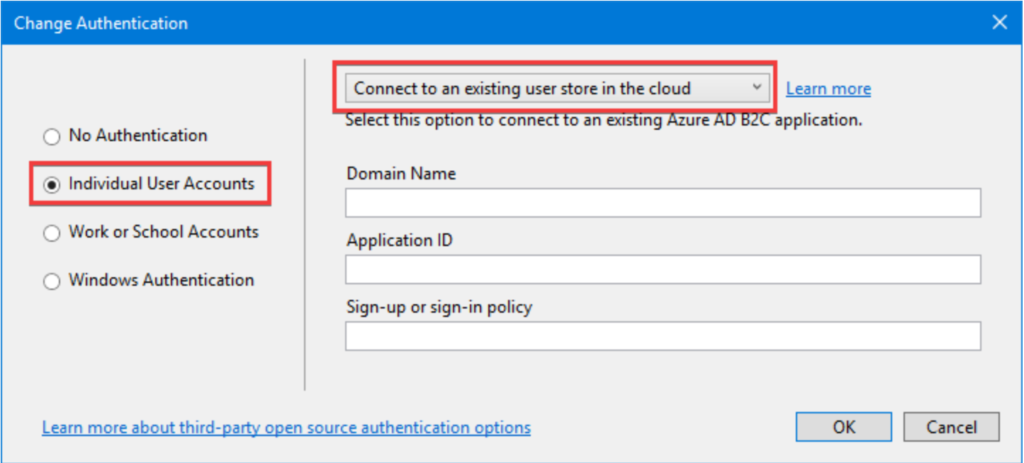
you can copy the application id and domain values from AZURE portal by clicking the application that you have created in Step 2
It adds the following code to startup.cs file
      public void ConfigureServices(IServiceCollection services)
         {  services.AddAuthentication(AzureADB2CDefaults.BearerAuthenticationScheme)
            .AddAzureADB2CBearer(options => Configuration.Bind("AzureAdB2C", options));
            services.AddMvc()
            .AddNewtonsoftJson();
         }
Above code reads the configuration values from appsettings.json and adds to bearer authentication.
{
   "AzureAdB2C": {
     "Instance": "https://login.microsoftonline.com/",
     "ClientId": "<< get value from azure portal>>",
     "Domain": "TbTenant.onmicrosoft.com"
   },
   "Logging": {
     "LogLevel": {
       "Default": "Warning",
       "Microsoft.Hosting.Lifetime": "Information"
     }
   },
   "AllowedHosts": "*"
 }
It also adds Authorize attribute to the controller. At this point if you run the API then you will get unauthorized error.
Step 4 – Get Token and call API from postman
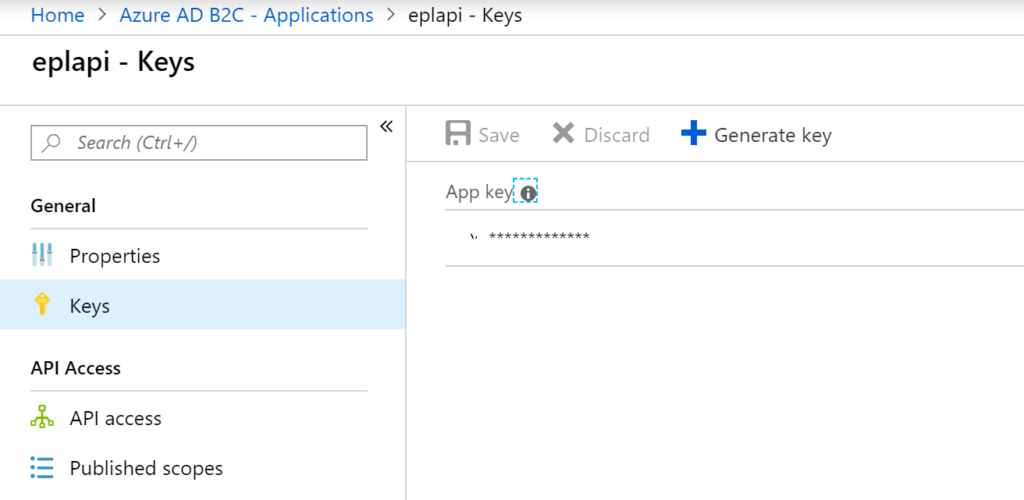
Lets assume postman is your client, In order to postman access the web api you need to register as application in azure portal by repeating points in Step2. Additional step is creating a secret.
Create a secret for postman by adding a key in portal
open post man and send post request to https://login.microsoftonline.com/tbtenant.onmicrosoft.com/oauth2/token

Enter four parameters grant_Type, client_id, client_secret and resource in body as x-www-form-unicoded. The resonse will be token
Now use the token that you got in above step and send the request to API endpoint to get the response POST request as follows
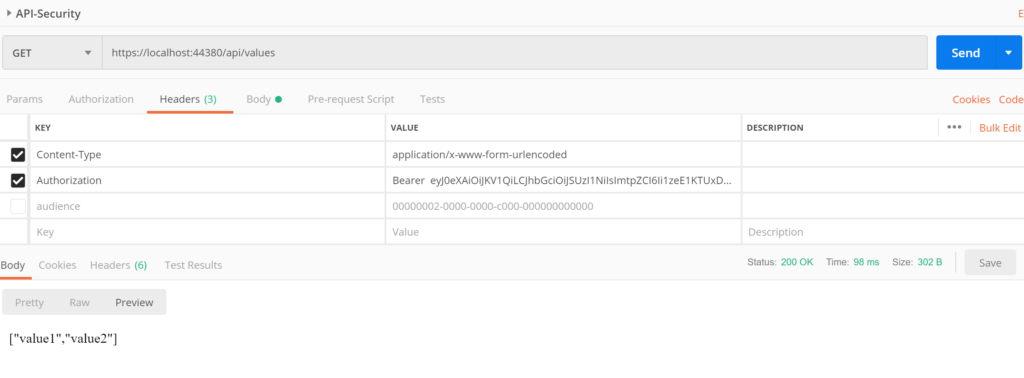
Add the authorization header and in value section type bearer space and paste token. set content type as applicaiton/x-www-form-unicoded and send the request to see the response.
In this method AZURE AD wouldn’t prompt any login screen to access Web API. Above Web API can be consumed in any java script based application or mobile app. All you need to do is register your clients in AZURE portal like mentioned in this post and share client secrets and api endpoint then clients can consume your API in secure channel.
Good info. Is it work with service account?
No. There is no service account concept in cloud. You need to register your API to AZURE AD as mentioned in post.
thanks
K